How to Install Vee's Plugin on Your WordPress Site Using a Header/Footer Plugin
The simplest and most user-friendly method to install Vee’s Plugin on a WordPress website is by utilizing a header/footer plugin. This approach is widely supported by many websites.
While it’s also possible to embed Vee’s Plugin directly into your site’s source code (typically at the end of the body tag), this process requires a certain level of technical expertise.
This guide provides step-by-step instructions for the installation process using the header/footer plugin.
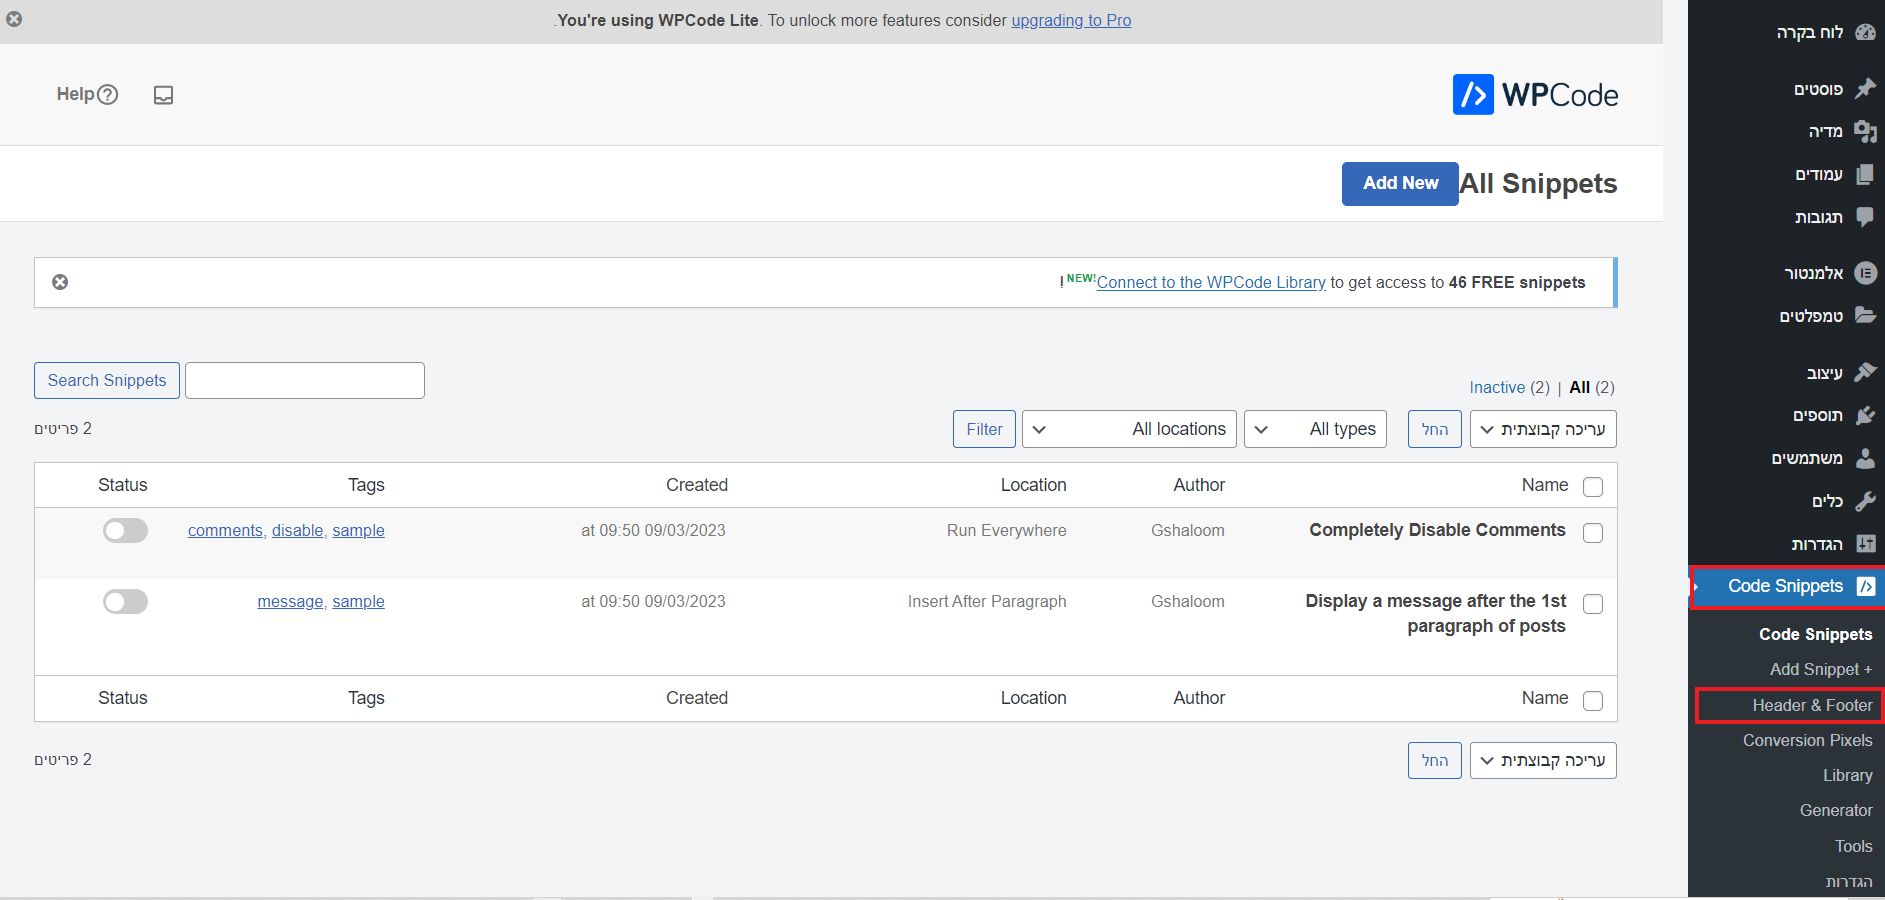
1. Within your WordPress control panel, locate the header/footer plugin you already have on your website (if it is not installed yet, you'll need to download it separately).

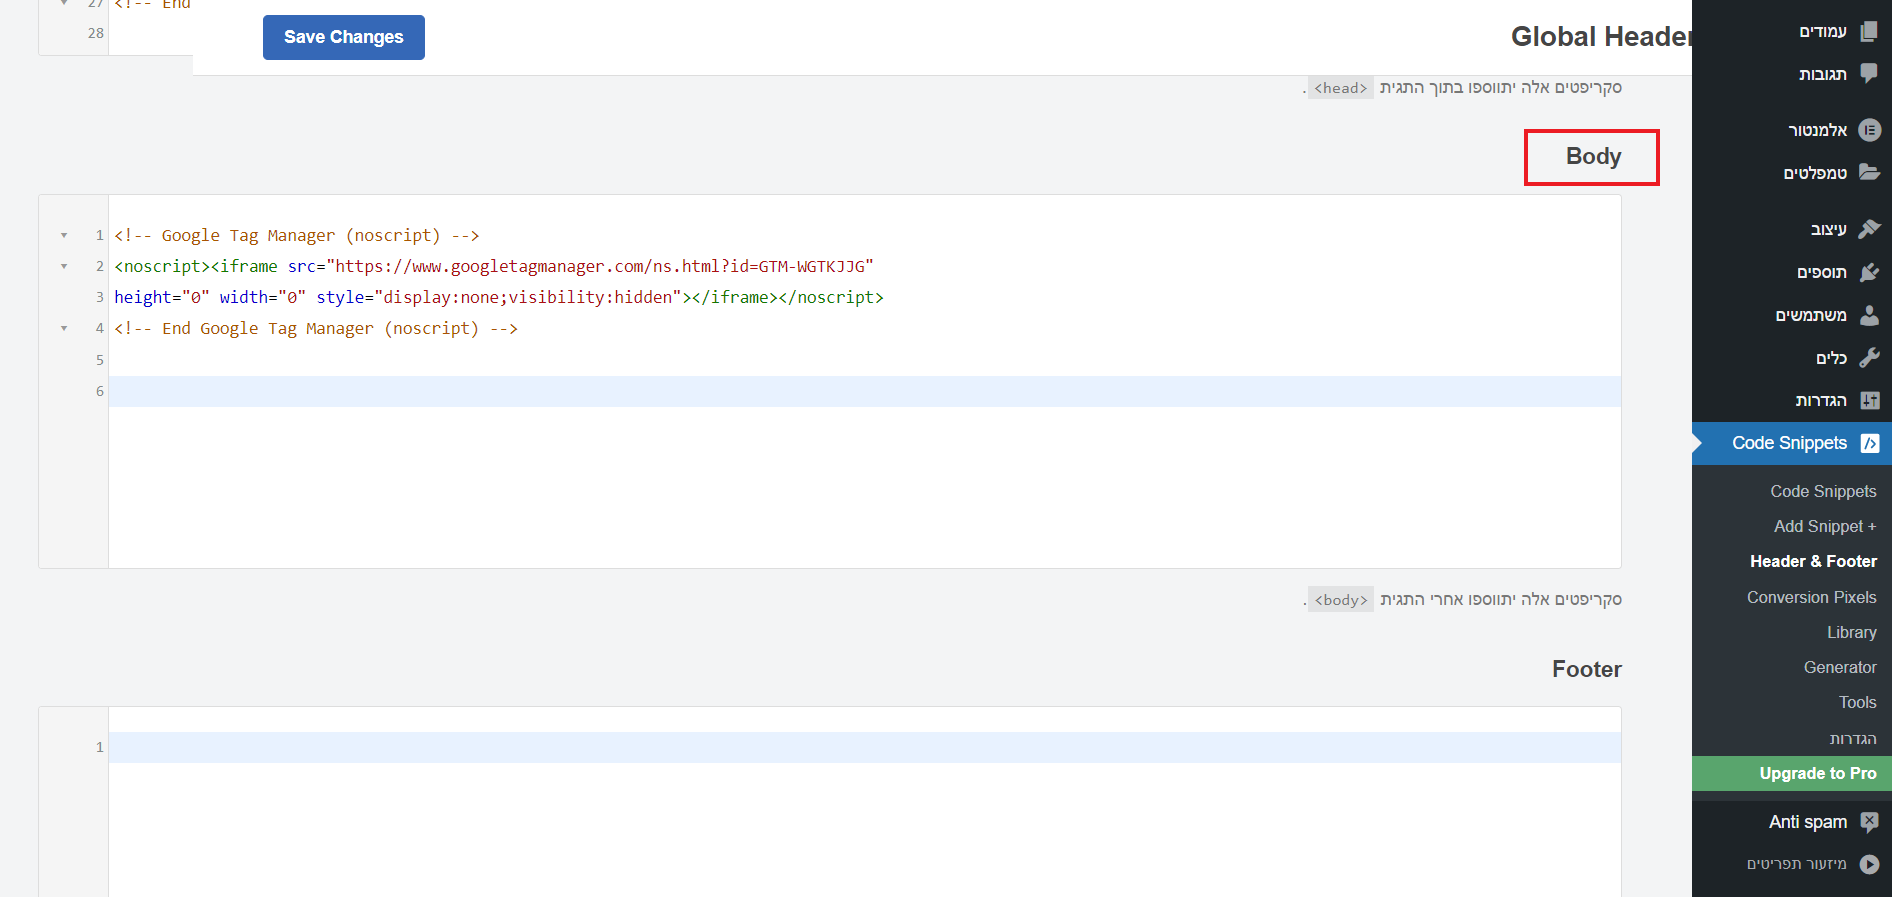
2. Scroll down until you find the 'Body' tag.

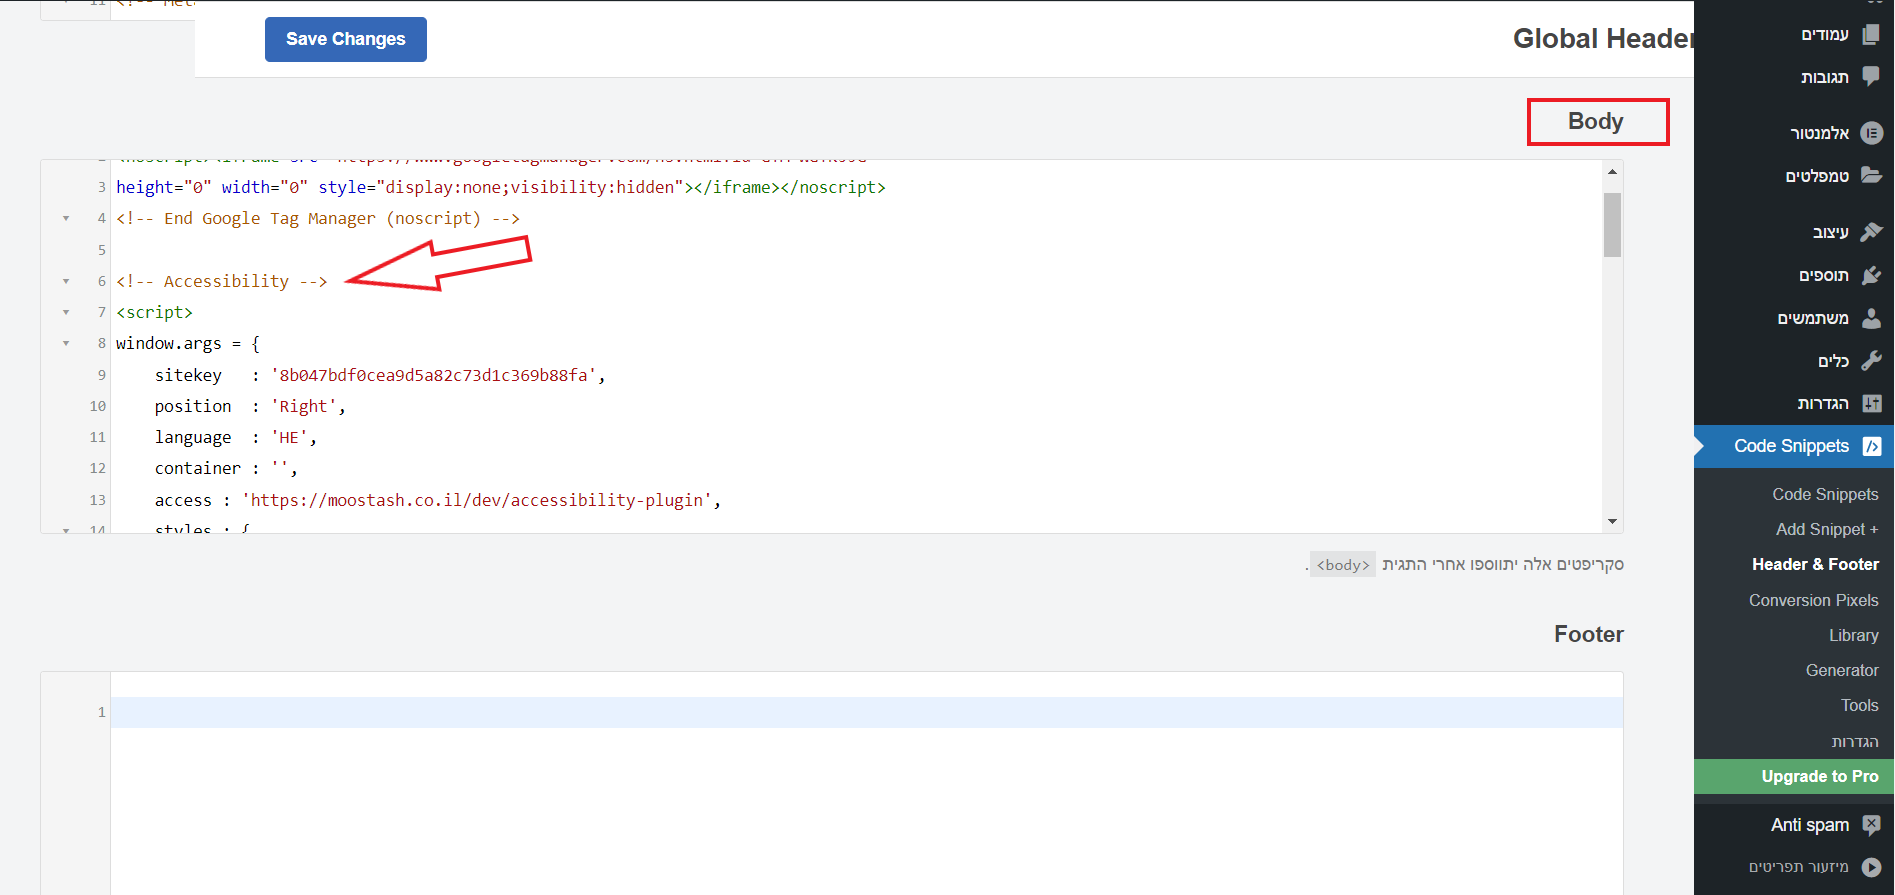
3. Paste the code we sent you via email in the section allocated for the 'Body' tag. (If there's already another code in the body tag, scroll down two lines and insert our code).

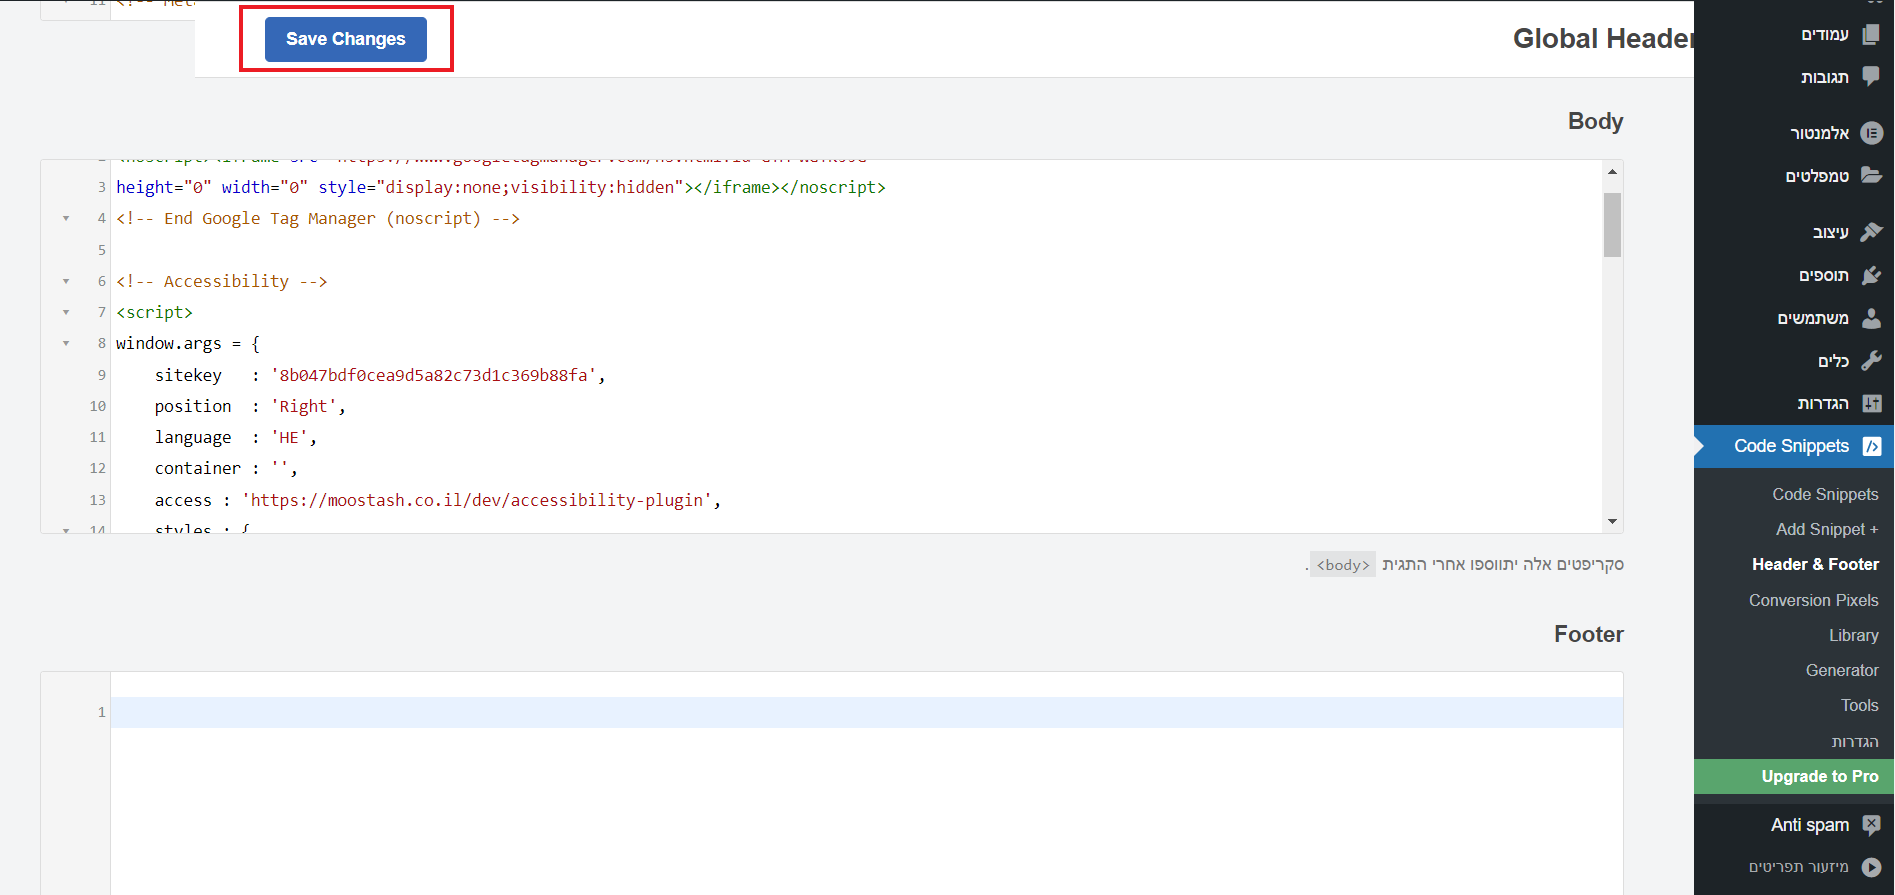
4. To complete the process, click on 'Save'.


